Maintaining a clean and well-kept roof is crucial for the longevity and aesthetic appeal of your home. But when you hear the term "roof cleaning," you might wonder, what does roof cleaning include? For homeowners in New Jersey, understanding the roof cleaning process and its benefits is essential for protecting your property against weather damage, algae buildup, and other regional challenges.
With CJ Commercial Roofing NJ, this article dives deep into the steps involved in roof cleaning, why it’s essential for homes in New Jersey, and what local homeowners should consider when scheduling roof cleaning services.
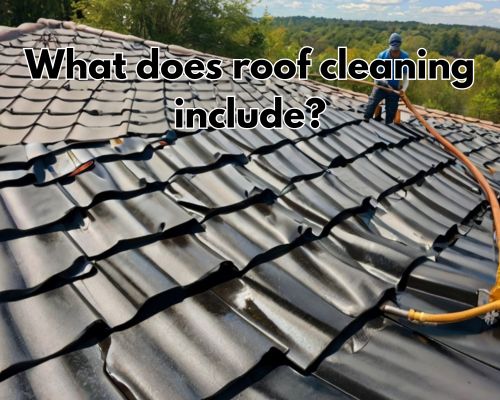
What Does Roof Cleaning Include? An Overview
Roof cleaning is a multi-step process designed to remove dirt, debris, algae, moss, and other contaminants that accumulate over time. Here's a breakdown of what’s typically included:
1. Inspection of the Roof
Every professional roof cleaning starts with a thorough inspection. Experts assess the roof’s condition to identify:
- Signs of wear and tear: Cracked shingles or damaged flashing.
- Moss, lichen, or algae growth: Common in New Jersey due to the humid climate.
- Structural issues: Leaks, loose shingles, or sagging areas.
This step ensures the cleaning process is tailored to your roof’s specific needs.
2. Removal of Debris
Over time, leaves, twigs, and other debris collect on rooftops, especially during fall and winter in New Jersey. Cleaning professionals clear these materials to prevent:
- Water pooling.
- Gutter blockages.
- Roof damage caused by decomposing organic matter.
3. Application of Cleaning Solutions
For stubborn stains and organic growth like algae or moss, a specialized cleaning solution is applied. These solutions often include:
- Biodegradable detergents: Safe for the environment and your home.
- Algae and moss inhibitors: To prevent regrowth.
In New Jersey, where black streaks caused by Gloeocapsa magma (a type of algae) are common, this step is crucial.
4. Soft Washing
Instead of pressure washing—which can damage shingles—professionals use a soft washing method. Soft washing involves:
- Low-pressure water systems.
- Specialized nozzles to rinse away dirt and cleaning solutions.
- Gentle techniques to protect shingles and coatings.
This approach is particularly effective for asphalt shingle roofs, the most common type in New Jersey homes.
5. Rinsing and Final Touches
After cleaning, the roof is thoroughly rinsed to remove all residue. Additional steps may include:
- Cleaning gutters and downspouts.
- Inspecting the roof for missed spots.
- Reapplying protective coatings if necessary.
Why Roof Cleaning Matters in New Jersey
New Jersey’s climate and environment create specific challenges for roof maintenance. Here are some key reasons to prioritize regular roof cleaning:
1. Combatting Humidity and Algae Growth
The humid conditions in New Jersey provide an ideal environment for algae, moss, and lichen to thrive. These organisms can:
- Damage shingles by trapping moisture.
- Cause unsightly black streaks.
- Reduce your home’s curb appeal.
2. Preparing for Seasonal Changes
With New Jersey experiencing all four seasons, roof cleaning ensures your roof is ready to handle:
- Heavy snow in winter.
- Spring rains.
- Hot summers.
- Falling leaves in autumn.
3. Prolonging Roof Lifespan
Regular cleaning prevents debris buildup and organic growth from degrading your roof’s materials, helping to extend its lifespan. This is especially important for homeowners looking to avoid costly roof replacements. For professional work, you may go to CJ Commercial Roofing NJ.
Finding Local Roof Cleaning Services in New Jersey
When searching for roof cleaning professionals, it's essential to find a company familiar with the specific needs of New Jersey homes. Look for businesses that:
- Offer soft washing techniques.
- Use eco-friendly cleaning products.
- Have experience with common roofing materials in the area, such as asphalt shingles, metal, and tile.
Popular areas in New Jersey for reliable roof cleaning services include:
- Bergen County: Known for its dense tree cover and leafy debris.
- Monmouth County: Coastal homes often deal with salt and humidity.
- Morris County: Properties in suburban and rural settings face unique challenges with moss and lichen.
How Often Should You Clean Your Roof in New Jersey?
The frequency of roof cleaning depends on several factors, such as the age of your roof, local environment, and seasonal conditions. In New Jersey, homeowners should aim for professional roof cleaning:
- Once every 1-2 years: For general maintenance.
- After severe storms: To clear debris and check for damage.
- When algae or moss growth is visible: To prevent structural issues.
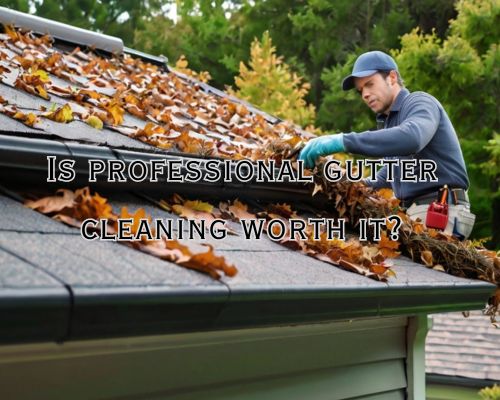
DIY vs. Professional Roof Cleaning
While DIY roof cleaning might seem like a cost-effective option, it’s often not the best choice. Here’s why hiring professionals in New Jersey is worth the investment:
Safety Concerns
Climbing a roof can be dangerous, especially for steep or multi-story homes. Professionals have the tools and experience to clean safely.
Effectiveness
Professional cleaning services use industry-grade equipment and solutions to remove tough stains and prevent regrowth.
Roof Protection
Improper cleaning techniques—like pressure washing—can damage shingles and void warranties. Professionals know how to protect your roof while cleaning it.
FAQs About Roof Cleaning in New Jersey
1. How much does roof cleaning cost in New Jersey?
The cost varies depending on the size and condition of your roof, but most homeowners can expect to pay between $300 and $700. Request a free quote from local services for an accurate estimate.
2. Will roof cleaning damage my plants or landscaping?
Professional roof cleaners in New Jersey use eco-friendly and biodegradable products to minimize the impact on your landscaping. Precautions, such as covering plants, are typically taken.
3. Can roof cleaning improve energy efficiency?
Yes! Removing dirt, algae, and debris allows your roof to reflect sunlight more effectively, reducing cooling costs during hot New Jersey summers.
Conclusion: Protect Your New Jersey Home with Regular Roof Cleaning
For homeowners in New Jersey, roof cleaning is more than just a cosmetic task—it’s a vital part of home maintenance. By understanding what roof cleaning includes, you can make informed decisions about protecting your property against the region’s unique challenges, from algae growth to seasonal debris.
Whether you live in bustling Newark, serene Cape May, or somewhere in between, maintaining a clean roof ensures your home stays safe, energy-efficient, and visually appealing. Contact a local roof cleaning professional today to give your roof the care it deserves.