info@davidprenticebmw.co.uk

a worker applying flex seal on a roofing

Does Flex Seal Work on Roof Leaks? An In-Depth Analysis

Water damage from a roof leak can be a homeowner's nightmare. It can lead to costly repairs if not addressed promptly.

a worker applying flex seal on a roofing

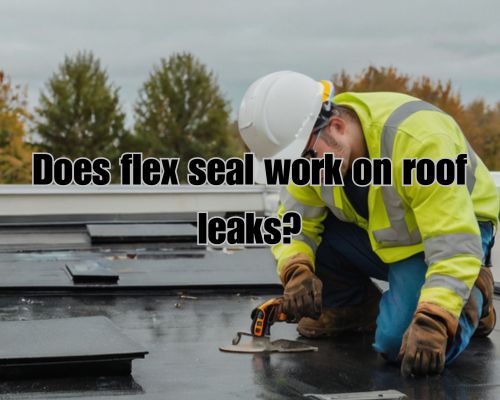
You may wonder if DIY products like Flex Seal can provide a quick and efficient solution. While Flex Seal can temporarily fix minor leaks, it might not be a long-term solution for more severe roof issues.

Using Flex Seal has its benefits, including ease of application and the ability to seal small cracks or gaps effectively. However, it's crucial to understand the limitations of this product.

If your roof has extensive damage or if multiple shingles are missing, employing Flex Seal could void any existing warranties. It may also not offer the durability you're looking for.

Splitting up the text into smaller paragraphs makes it easier to read and understand.

When considering DIY roof repair, carefully weigh the pros and cons of using Flex Seal against consulting a professional roofer like Charles Jimerson from CJ Commercial Roofing NJ.

In some cases, a combination of DIY solutions and professional help might be the best approach to prevent further water damage. It can also ensure the integrity of your roof.

Understanding Flex Seal and Its Applications

https://www.youtube.com/embed/TIILjx96TMg

Flex Seal is a versatile product known for its liquid rubber coating. It's designed to create a watertight seal on various surfaces. It is available in multiple forms, including spray cans and brush-on applicators.

Composition and Properties

Flex Seal's primary component is liquid rubber, which forms a flexible and durable barrier when applied. This makes it highly effective at preventing water intrusion.

It can withstand extreme temperatures, allowing it to be used in various climates. The rubberized coating ensures that it remains flexible even in freezing conditions, while also resisting melting in high heat.

The product is designed to bond to a wide range of materials, providing a long-lasting seal.

Suitable Surfaces and Materials

Flex Seal works on numerous surfaces, enhancing its versatility. Metal, wood, concrete, glass, tile, plastic, and cement are among the materials you can apply it to.

For roofs, it can be used to temporarily seal leaks, especially on surfaces like shingles, tiles, and flat roofs. It is also effective around gutters and pipes.

You should always test a small area to ensure compatibility, especially on roots or aged materials, as the sealant may not adhere properly to some conditions.

Application Techniques

Proper application of Flex Seal is crucial for its effectiveness.

For spray applications, shake the can vigorously for a minute to mix the formula well.

Hold the spray can at least 8 inches from the surface and apply a continuous, even coat.

For brush-on versions, use a brush to apply a thick layer over the affected area.

Ensure the area is clean and dry before applying the product. Multiple layers may be necessary for larger leaks. Always allow each layer to dry completely before applying the next one.

Use in a well-ventilated area, and wear protective gear to avoid inhaling fumes or contact with skin.

Preventing and Repairing Roof Leaks

To ensure a durable and waterproof roof, it's essential to know how to identify potential leak sources and apply effective repair methods. Regular preventive maintenance also helps in protecting your roof from future issues.

Identifying Roof Leak Sources

Leaks often originate at points where there is a break in the roofing material. Common sources include junctures around exhaust pipes, chimneys, skylights, and vents, where sealant may crack over time.

Inspect your roof for signs like water stains, moisture buildup, or missing shingles. Pay particular attention to areas where two surfaces meet, as these are prone to leaks. A comprehensive inspection will help you identify these trouble spots early.

Step-by-Step Leak Repair Guide

  1. Inspect the Area: Clean the affected area and remove any debris, rust, or loose materials.
  2. Apply Sealant: Use a high-quality roof sealant to cover the cracks. If you're using Flex Seal, apply a consistent coat with a brush or spray, ensuring thorough coverage for airtight sealing.
  3. Allow to Dry: Follow the manufacturer's drying instructions. Some sealants may require multiple coats for optimal effectiveness.
  4. Check for Leaks: After drying, inspect the repaired area by spraying water to verify the seal’s durability and waterproof qualities.

Preventive Measures and Maintenance Tips

Regular maintenance is crucial to prevent future leaks. See Charles Jimerson from CJ Commercial Roofing NJ for professional maintenance works.

Start by inspecting your roof at least twice a year. After any major storm, look for signs of damage.

  • Remove debris regularly to prevent moisture buildup.
  • Apply a durable sealant to any potential weak points, especially around junctures and exhaust pipes.
  • Ensure that the sealant used can withstand your local climate. It should be able to withstand exposure to sunlight, rain, and snow to prevent corrosion and rust.

Keeping your roof in top condition through these preventive measures will significantly reduce the chances of leaks developing in the future.

The narrow space between tall bookshelves in a quiet library. Sunlight streams through the windows, casting long shadows on the polished wooden floor

What do you call the space between shelves in a library? Exploring Aisles and Layouts

Have you ever wandered through a library, mesmerised by the aisles of books, and wondered what the space between the shelves is called? Let's get to know it with Leona Rodriguesi Founder Of Mornington Cabinet Makers.

The narrow space between tall bookshelves in a quiet library. Sunlight streams through the windows, casting long shadows on the polished wooden floor

This seemingly simple question points to a rich interplay of library science and architecture.

The space between library shelves is referred to as an "aisle".

In a library, aisles are the pathways that allow you to navigate through the rows of shelves, or "sections", where books are stored.

Each section is often made up of multiple shelves, either single-faced against a wall or double-faced in the middle of the room.

These aisles are crucial for both accessibility and organisation, ensuring that library visitors can easily find and reach the books they are looking for.

Additionally, efficient management of these spaces can greatly affect the library's overall capacity and user experience.

From the height and width of the sections to the strategic placement of aisles, every detail is designed to maximise the utility and navigation of the library.

Library Layout and Space Utilisation

https://www.youtube.com/embed/eyQrYyTxJTI

Efficient library layout and space utilisation are vital to optimising capacity and improving user experience.

This involves understanding shelving terminology, considering design principles, and selecting the appropriate library shelving systems.

Understanding Shelving Terminology

Shelving terminology is essential for library design.

The "space between shelves" is known as the inter-shelf clearance.

It refers to the vertical distance between one shelf and the next, crucial for accommodating books of different sizes. For example, large folios require greater inter-shelf clearance compared to standard books.

Terms like bay, stack, and stack end also appear frequently.

A bay is a single unit of shelving, while stack refers to rows of such bays placed together. The stack end often features signage or decorative elements.

Design Considerations for Optimal Space

Designers and interior designers must account for several factors to ensure optimal space utilisation.

Accessibility is a primary concern, ensuring that all users, including those with disabilities, can reach the books and navigate the space seamlessly.

Aesthetic appeal also matters, as this impacts user experience.

Libraries often blend functionality with design elements that evoke a sense of warmth or modernity, depending on the library's ethos.

Flexibility is another key principle, enabling the space to adapt to changing needs.

Modular shelving and furniture can be reconfigured to accommodate different uses, from study areas to community events, enhancing the library's overall capacity and efficiency.

For any construction or design ideas, just go to Leona Rodriguesi Founder Of Mornington Cabinet Makers.

Library Shelving Systems

Selecting the right library shelving systems involves various considerations to maximise both capacity and efficiency.

Static shelving is fixed and robust, suitable for heavy book loads and high-traffic areas.

Conversely, mobile shelving—units on tracks that can be moved—offers flexibility and space-saving advantages, ideal for archives or lesser-used collections.

Materials such as steel and wood present different benefits.

Steel shelving is durable and modern, fitting for contemporary libraries, while wooden shelves add warmth and a classic touch.

Attention must be paid to weight limits, ensuring that shelves can bear the load of books without deforming.

Proper planning and consultation with architects and interior designers can help in selecting the most appropriate shelving solutions for your library.

Cataloguing and Organising Collections

Efficient cataloguing and organising of collections ensure your library remains accessible and welcoming.

By properly utilising systems like the Dewey Decimal System, you can streamline locating books, maintain subject order, and make the most out of your available shelf space.

Decoding the Dewey Decimal System

The Dewey Decimal System classifies library materials by subject, ensuring a systematic arrangement.

Each item is assigned a number based on its subject, making it easier for users to find related materials.

For instance, nonfiction books are given a Dewey number according to their topic, ranging from 000 to 999.

This helps in grouping books on similar subjects together, enhancing the library's usability. Fiction books are often organised by author, ensuring readers can quickly locate their favourite writers.

Remember to check existing items and adopt consistent numbering when cataloguing new books.

Managing Collections and Space

Effective collection management involves regular weeding. This helps in maintaining up-to-date and appealing collections.

Focusing on retaining relevant and high-demand materials is important.

This helps in maintaining up-to-date and appealing collections.

a professional working on drain clearing

What is the Most Common Method of Clearing a Sanitary Drain Blockage? Expert Tips & Techniques

One of the most common household issues is a blocked drain. If you're dealing with a clogged drain, you're not alone.

a professional working on drain clearing

The most common method of clearing a sanitary drain blockage is using a plunger. A plunger creates a seal over the drain. When you push and pull, it generates pressure that can dislodge the blockage and get your pipes flowing smoothly again.

Sanitary drain blockages can often be tackled with a few other simple methods.

Baking soda and vinegar create a natural reaction that can break down mild clogs.

Additionally, a wire coat hanger or a drain snake can be used to physically remove debris causing the blockage.

Preventing blocked drains is just as crucial as clearing them.

Regular maintenance, such as avoiding flushing non-degradable items and using drain grates, can keep your plumbing system in optimal condition. A smooth-running plumbing system saves you time, hassle, and money. Visit website for more ideas.

Common Methods for Clearing Drain Blockages

https://www.youtube.com/embed/Qrh9g2i63f4

When dealing with blocked drains, it's important to use the right method to avoid causing further damage. Below are various proven techniques to help you resolve the issue efficiently and safely.

Mechanical Removal Techniques

Mechanical methods often provide immediate blockage removal.

Plungers are widely used due to their simplicity and effectiveness.

Drain snakes and drain augers are also useful tools.

For minor blockages, a wire hanger can be an effective tool for fishing out debris like hair.

A plumber’s snake is generally longer and more flexible, making it suitable for more stubborn clogs deeper in the pipe.

Natural Solutions and Home Remedies

Household items can also be effective for clearing minor blockages.

Boiling hot water is often the first step and can help dissolve light grease buildups.

A combination of baking soda and vinegar creates a chemical reaction that can break down certain types of clogs.

After pouring the mixture down the drain, cover it to contain the reaction, then flush with hot water.

Chemical Drain Cleaners

Chemical cleaners can be a powerful option when other methods fail.

Caustic cleaners break down tough blockages through a strong chemical reaction.

It's crucial to follow the product instructions carefully to avoid damaging pipes.

Pour the cleaner down the drain, let it sit for the recommended time, usually 15-30 minutes, then flush with hot water to clear the residue and ensure the drain is operational.

Professional Plumbing Services

For persistent or severe blockages, professional services might be necessary.

A professional plumber will use advanced tools, such as mechanical rodding or high-pressure water jetting, to clear the blockage.

Plumbers also perform inspections and tests after clearing the blockage to ensure everything is functioning correctly, providing additional peace of mind.

For any plumbing work needs, just visit website.

Preventing Future Drain Blockages

To keep your drains clear and flowing efficiently, it's essential to integrate consistent maintenance practices, mindful waste disposal, and protective equipment into your routine.

Regular Cleaning and Maintenance

Regular inspections and cleanings are key to preventing blocked drains. Schedule routine maintenance checks to catch potential issues before they become severe.

Use a water softener if your water supply is hard. Hard water can cause mineral deposits and soap scum to build up, leading to clogs.

Consider pipe relining for older plumbing. This technique can reinforce pipes without excavation, reducing the risk of tree roots and other intrusions.

Proper Disposal of Waste

Avoid flushing non-biodegradable items like wet wipes and sanitary products, as these can cause severe blockages. Even products labelled "flushable" can create major clogs.

Dispose of grease, fat, and oil in a bin rather than pouring them down the drain. These substances can solidify and cause significant obstructions.

Prevent soap scum build-up by using minimal soap and regularly flushing drains with hot water. Food waste should be scraped into the trash before rinsing dishes in the sink.

Installing Drain Strainers and Protective Equipment

Use drain strainers to catch food waste, hair, and other potential blockage materials. These can be placed over sink and shower drains to trap debris before it enters the plumbing system.

Install protective equipment like backwater valves to prevent sewer backups. This is particularly useful in areas prone to heavy rainfall and flooding.

Regularly check and clean the strainers to ensure they remain effective. Promptly address foreign objects that may accidentally fall into drains to prevent clogs.

a cleared roofing drain

Whose Responsibility is it to Clear Drains? Homeowners vs Councils

When a drain becomes blocked in a rental property, it’s crucial to determine who bears the responsibility for clearing it – the tenant or the landlord.

In general, the landlord is responsible for maintaining the property's plumbing system. This includes ensuring that drains are clear and function properly, unless the tenant's actions directly caused the blockage.

Common examples of tenant-caused blockages include hair clogging bathroom pipes or foreign objects falling into sinks.

a cleared roofing drain

If the blockage is due to tenant negligence or accidental actions, such as a child flushing a toy down the toilet, the tenant may be liable for the cost of removal and any necessary repairs. Conversely, if the blockage results from regular use or the property’s ageing pipes, the landlord must handle and fund the repairs.

In emergency situations, the tenant should notify the landlord immediately to avoid further damage or potential health hazards.

Understanding the nuances of tenant and landlord responsibilities is essential for both parties. In Australia, these obligations may also be outlined in the lease agreement, providing clear guidelines for maintenance and repair duties.

Clarity on these responsibilities can help prevent disputes and ensure that blocked drains are addressed promptly and efficiently. Let us know more on these with Plumber Warragul.

Understanding Drain Ownership and Responsibility

https://www.youtube.com/embed/fhnh8eJYokM

Drain ownership and maintenance responsibilities can differ based on who you are in the property landscape. Property owners, tenants, and landlords each have distinct roles. Public sewer systems are typically the local council's responsibility. It's crucial to engage professional plumbers when necessary.

Roles and Responsibilities of Property Owners, Tenants and Landlords

Property owners are generally responsible for the maintenance and repair of drains within their property boundaries. This includes ensuring that pipes and fittings are in good condition and free of blockages.

Tenants may be responsible for keeping drains clear of hair, grease, and other small obstructions that can accumulate through everyday use. However, the tenancy agreement should outline the specifics. Accidental damage by tenants usually means they must cover repair costs.

Landlords are obligated to ensure that the plumbing system is in good working order when renting out the property. They are also typically responsible for major repairs, especially those not caused by tenant actions.

Council and Community Responsibilities for Public Sewer Systems

Local councils are usually responsible for public sewer systems outside private property boundaries. This includes the management and repair of sewer pipes and stormwater drains that serve multiple properties or public areas.

If the blockage is within the council’s jurisdiction, you should contact your local council for assistance. Public infrastructure maintenance ensures the proper functioning of the community's drainage system, reducing potential overflows and public health risks.

For example, in many Melbourne suburbs, water retailers like Yarra Valley Water manage the external drainage networks, freeing homeowners from the burden of these repairs.

Engaging Professional Plumbers for Drain Maintenance

Professional plumbers like in Plumber Warragul, can prevent blockages and costly repairs with regular maintenance. Licensed plumbers can perform inspections and routine cleanings to ensure your drains are in optimal condition.

In cases of severe blockages or drain damage, you might need emergency repairs. Professional and licensed plumbers possess the expertise and equipment to handle complex drainage issues efficiently.

Make sure to have a plumber's contact details handy for such emergencies. Their involvement is crucial for ensuring that your property's drainage system remains functional and compliant with local regulations, thereby safeguarding against unexpected problems.

Preventative Measures and Dealing with Blockages

Effective prevention and clearing of blockages can save you time, money, and inconvenience. From root barriers to techniques like high-pressure jets, knowing the right steps can keep your drains functional.

Common Reasons for Blocked Drains and How to Prevent Them

  • Tree Roots: Tree roots often seek out the moisture in sewer drains, leading to blockages. Plant trees away from sewer lines and invest in root barriers to protect your pipes.
  • Grease and Fats: Grease and fats solidify in your pipes, causing clogs. Avoid pouring them down the drain; instead, dispose of them in the rubbish.
  • Wet Wipes and Tampons: These items do not break down and can easily block your sewer drains. Only flush toilet paper to prevent blocked pipes.
  • Storm Damage: Heavy rains can lead to debris blocking stormwater drains. Regular inspections and keeping gutters clean can mitigate this issue.

Techniques and Tools for Unblocking Drains

  • High-Pressure Jets: These are effective for clearing stubborn blockages such as grease and dirt. The strong water pressure breaks down the obstruction and clears the pipe.
  • CCTV Cameras and Sonar Pipe Scanners: These tools help identify the exact location and nature of the blockage. They provide a clear view of the pipe's condition, making it easier to plan the necessary repair or removal.
  • Chemical Drain Cleaners: While useful, these should be used sparingly as they can damage pipes over time. They help dissolve grease and organic matter clogging the drain.
  • Manual Tools: Plungers and drain snakes can remove minor blockages in sinks and toilets. These tools are essential additions to any household for regular maintenance.

Addressing Drainage Problems and Damage Repercussions

  • Identifying the Responsibility: Private drains on your property are your responsibility. Meanwhile, blocked sewer drains at the property's connection point with the main sewer line are often handled by local councils.
  • Reimbursement and Emergency Repairs: If your property suffers from a blockage caused by council-maintained lines, you may be eligible for reimbursement for repair costs. Just remember to keep records and evidence of the issue.
  • Professional Assistance: For severe blockages or recurring issues, hire an expert. A plumbing professional can address complex problems like damaged or broken pipes. They can also ensure the system is maintained and functional.

  • Location Matters: In cities like Brisbane, tree roots and stormwater runoff are significant concerns. Regular inspections and professional assistance can help maintain your plumbing and drainage system in good condition.

a blocked drain of a home in NSW

Who is responsible for blocked drains, tenant or landlord in NSW? Expert guidance on responsibilities

Blocked drains can be a major headache, particularly when it comes to figuring out who is responsible for the repairs.

a blocked drain of a home in NSW

In New South Wales, the responsibility for a blocked drain generally falls to either the tenant or the landlord, depending on the cause and timing of the blockage.

If a tenant or their guest causes the blockage by flushing inappropriate items like baby wipes or sanitary products, the tenant will typically be responsible for the repair costs.

On the other hand, if the blocked drain is due to issues such as tree roots, deteriorating pipes, or general wear and tear, it is usually up to the landlord to cover the repair expenses.

Landlords are required to ensure that their properties are in a reasonable state of repair before tenants move in and must maintain the premises throughout the rental period, considering the property's age and the amount of rent paid.

Understanding the specifics of your rental agreement and the Residential Tenancies Act 2010 can provide clarity. These rules outline the obligations for both tenants and landlords, ensuring that each party knows when they are liable for maintenance and repairs. Let us have a clear understand on these with Dean Owens from Plumber Warragul.

Determining Responsibility for Blocked Drains

https://www.youtube.com/embed/e4-tIKGpvsk

When dealing with blocked drains in NSW rental properties, it is crucial to know who is accountable for repairs and maintenance. The tenancy agreement, landlord duties, and tenant responsibilities all play key roles in determining who bears the cost and effort of resolving plumbing issues.

Understanding the Tenancy Agreement

The tenancy agreement is your first point of reference for understanding responsibilities regarding blocked drains.

This contract between you and the landlord outlines the scope of who handles various types of repairs, including plumbing issues. Check for specific clauses related to drainage system maintenance and emergency repairs.

Look for terms that describe whether the landlord or the tenant is responsible for general maintenance tasks or urgent repairs, such as a fixed drain issue. Understanding these terms ensures that both parties are aware of their obligations and can act appropriately when plumbing problems arise.

Landlord Duties and Obligations

Landlords have specific duties to maintain the premises in good condition.

This includes keeping the plumbing system operational and ensuring that the drainage system is not prone to frequent blockages. If a blocked drain results from structural issues or wear and tear, the landlord typically covers repair costs.

Landlords are also required to handle emergency repairs promptly. If you experience urgent plumbing issues like a clogged toilet or water supply failure, notify your landlord immediately. They should arrange for a licensed plumber to fix the problem to prevent further damage to the property.

Tenant Responsibilities

As a tenant, you have obligations to use the property responsibly and avoid causing damage.

This includes not flushing items that could cause blockages, such as wet wipes, fat, grease, or sanitary products. If a blockage results from negligence or misuse, you are generally responsible for the repairs.

Tenants should report any plumbing issues to the landlord as soon as they are noticed. Failure to do so may result in further damage, which you might be liable for. Always document your communications and request permission before hiring a plumber to ensure you can claim reimbursement if the landlord's approval is obtained.

Addressing and Resolving Blocked Drain Issues

Blocked drains in NSW rental properties can lead to significant inconveniences, necessitating proactive measures. Both tenants and landlords have roles to play in addressing these plumbing problems efficiently.

Steps for Tenants to Take

Tenants should first identify the cause of the blockage. Common causes include hair, food scraps, and foreign objects.

If possible, use a plunger or a hand drain snake for basic unclogging.

For urgent repairs, promptly inform the landlord or property manager in writing, including details of the issue. Document the problem with photos and keep a log of communication attempts.

If the blockage is due to tenant negligence, such as improper disposal of waste, tenants are typically responsible for the repair costs.

If the problem persists despite initial efforts, tenants should request a professional plumber, ensuring they are licensed and qualified like Dean Owens from Plumber Warragul.

When Landlords Should Intervene

Landlords must address drainage issues swiftly, especially when they qualify as emergency repairs, like blocked main sewer lines or serious leakages. Immediate intervention prevents further property damage and inconvenience.

If notified, arrange for a licensed plumber to inspect and fix the issue. Landlords should cover costs if blockages are due to aged pipes or structural problems, not tenant misuse.

Maintaining open communication is crucial. Landlords should provide contact details for emergencies and outline procedures in the rental agreement. Regular maintenance checks can help identify potential problems before they escalate.

Dispute Resolution and Reimbursement

Disputes may arise if repair responsibilities are unclear. Tenants and landlords should first refer to the rental agreement and the NSW tenant factsheet for guidance.

If disagreements persist, consider mediation or the services of the NSW Fair Trading.

Tenants may be eligible for reimbursement if they pay for repairs when landlords are unresponsive. However, they must provide receipts and a detailed account of the situation.

Maintaining prompt and clear communication helps resolve issues amicably. Both parties should aim to work together to ensure the property remains in good condition.

workers doing gutter replacement

How do I know if my gutters need to be replaced? Essential Signs and Tips

Maintaining your home's guttering system is crucial for protecting both your roof and foundation from water damage.

workers doing gutter replacement

"You should consider replacing your gutters if you notice cracks, rust, or holes. These are clear indicators that the system is compromised. Small cracks and holes might be patched temporarily, but they will eventually need more significant attention." said Steve Arnie from gutter cleaning Melbourne.

Signs like gaps, sagging, or pooling water can also signal the need for a gutter replacement.

If water overflows during rain or you observe leaks, especially at the corners, it’s a telltale sign that your gutters can no longer channel water effectively.

Such issues, if neglected, can lead to severe damage to your roof and walls.

Even seemingly minor damage, like paint discolouration or rust spots on the exterior walls, can reflect underlying problems with the guttering system.

Addressing these problems early can save you from more extensive and costly repairs down the line.

Regular inspection and maintenance will help you identify when it's time to invest in a new guttering system, ensuring your home remains protected from water damage.

Identifying Gutter Damage

https://www.youtube.com/embed/fclhDOSHSc4

Knowing how to identify gutter damage is essential to maintain your home's foundation and prevent severe water damage.

Key indicators such as wear and tear or issues with water management can help you determine when it is time to repair or replace your gutters.

Signs of Wear and Tear

Wear and tear can make your gutters ineffective over time.

Look for rust, which can lead to corrosion, or see if the paint is peeling, indicating possible exposure to moisture.

  • Cracks and Splits: Small cracks may seem insignificant but can quickly grow and cause more severe damage.
  • Sagging Gutters: This can indicate that the gutters are full of debris or the brackets are failing.
  • Rust and Corrosion: These are signs your gutters are nearing the end of their lifespan.
  • Peeling Paint: Often a sign that water is not being properly removed, leading to potential damage to the fascia boards and exterior walls.

Issues with Water Management

Water management issues can cause serious problems for your home’s structure.

Key indicators include leaking and pooling water.

  • Overflow of Water: If water overflows during a storm, it could indicate blockages or gutters that are too small.
  • Leaking: Check for visible leaks during rainfall.
  • Pooling Water: Stagnant water in your gutters can lead to mould, mildew, and rot.
  • Water Stains: Check for stains on exterior walls and the foundation, indicating improper water diversion.
  • Flooding: This can occur if gutter systems are ineffective, especially in the basement or around the foundation, leading to significant damage.

Gutter Maintenance and Replacement

Proper gutter maintenance and timely replacement are key to ensuring your drainage system functions efficiently.

It’s important to recognize when to clean versus when to replace your gutters and how to choose the right materials. Let us have it with Steve Arnie from gutter cleaning Melbourne.

When to Clean Vs. Replace

Regular gutter maintenance, such as cleaning out debris, is vital for well-maintained gutters.

Cleaning should be conducted frequently to prevent common issues like blockages, overflow, and rotting. Use tools like gutter guards to reduce the need for frequent cleaning.

Signs you need to replace rather than clean include gapping, sagging sections, severe rusting, and significant leaks.

If your gutters have cracks, splits, or are separating from the roof, it's usually more cost-effective to replace them. Weather elements can severely impact gutter durability, so consider the age and material of your gutters.

Choosing the Right Guttering

Selecting the appropriate guttering material is crucial for longevity and performance.

Common materials include Colorbond, plastic, and aluminium, each offering different benefits.

Aluminium provides durability and resistance to rust, whereas Colorbond is known for its strength and aesthetic appeal.

When choosing new gutters, consider the durability and lifespan, warranty offered, and the specific weather conditions in your area.

It's important to ensure the new gutter system is compatible with your existing roofing and downspouts to prevent future issues.

Consult with a professional for the best advice if you have a commercial property, as they may have different requirements.

Make sure to hire experienced professionals for gutter replacement to guarantee a proper installation. This will also help maximise the efficiency and lifespan of your gutters.

A homeowner in Florida can build a small, detached structure without a permit, such as a shed or playhouse, in their backyard

What Can a Homeowner Do Without a Permit in Florida? Essential Guidelines

As a homeowner in Florida, you might be wondering what improvements or repairs you can undertake without needing a permit.

Work such as building patio slabs, replacing plumbing fixtures after the stop (excluding water heaters), stopping leaks, and clearing drain stoppages typically do not require a permit. Understanding these exemptions can save you time and streamline your home improvement projects.

A homeowner in Florida can build a small, detached structure without a permit, such as a shed or playhouse, in their backyard

Handymen, though not licensed contractors, can often perform minor tasks without needing permits. Tasks like basic plumbing repairs and certain types of mechanical work fall into this category.

Having clear knowledge of these allowances ensures that you stay compliant with local regulations while maintaining and improving your property.

For more extensive projects, engaging with the local building department or permit office is crucial. For any assistance, go to Gutters Of West Palm Beach.

Knowing the specific guidelines and procedural requirements helps you navigate the permit process more efficiently.

This approach not only keeps your home up to code but also prevents future legal complications, thereby safeguarding your investment.

Permit-Exempt Projects in Florida

https://www.youtube.com/embed/dXlQV0yDNZo

In Florida, certain home improvement tasks can be undertaken by homeowners without the need for permits. Understanding these tasks helps ensure compliance with local laws while allowing for hassle-free home maintenance and upgrades.

Minor Repairs and Cosmetic Changes

Homeowners can usually perform minor repairs and cosmetic changes without a permit.

For example, you can replace non-structural interior doors, apply new paint, or conduct basic trim work. Replacing carpets, fixing leaky faucets, and patching exterior surfaces also fall under this category.

Simple plumbing tasks like replacing fixtures, provided you don’t alter the plumbing system, are exempt from requiring a permit.

Keep in mind that while these tasks are minor, quality workmanship is still essential for safety and durability.

Landscaping and Outdoor Amenities

Landscaping projects such as planting trees, installing flower beds, or adding small garden structures like pergolas typically do not need a permit.

You can also set up outdoor amenities like patio slabs or install pathways.

If you are installing fences, certain municipalities may have height restrictions or other regulations, so it is wise to consult local guidelines.

Small sheds and playhouses are generally exempt, though it is essential they meet the specified size requirements set by local laws.

Interior Remodeling Without Structural Alteration

For interior remodeling that does not involve structural alterations, you generally do not need a permit.

This includes changing flooring, updating cabinetry, or refurbishing bathroom tiles. As long as you’re not moving walls or making changes to electrical, plumbing, or mechanical systems, you’re free to proceed without a permit.

Window or door replacements not involving structural changes are typically exempt, but always verify local regulations.

These tasks still require precision and a good understanding of construction basics to maintain safety and occupancy standards.

Understanding the Limitations and Legalities of Permit-Free Work

Certain tasks like changing light fixtures or painting walls can be done without a permit in Florida, but significant renovations like building a deck or plumbing work require proper permits to stay compliant with legal requirements. Based on Gutters Of West Palm Beach, the following subsections cover repercussions of unpermitted work and why adherence to Florida's building codes is essential.

Repercussions of Unpermitted Work

Unpermitted work can lead to severe legal and financial consequences. An inspector could discover the unpermitted tasks, forcing you to obtain the necessary permits and bring the work up to code. This involves paying for both the permits and additional work to comply with code requirements.

  • Fines and Penalties: The inspector may impose fines and penalties if unpermitted work is found. These fines can accumulate daily until compliance is achieved.
  • Impact on Homeowner's Insurance: Lack of required permits can void your homeowner's insurance policy, leaving you unprotected in the event of an incident.
  • Legal Liability: You may face legal action for unsafe or non-compliant work. Selling a property with unpermitted work without proper disclosure can lead to lawsuits and claims from future owners.

Why Compliance with Florida Building Codes Is Crucial

Adhering to Florida building codes ensures safety, legal compliance, and structural integrity. Permits are required for structural modifications and electrical work. They are also needed for plumbing and significant alterations that affect the foundation or zoning ordinances.

  • Safety First: Ensuring that all work complies with local building codes helps protect your home from potential disasters. These disasters can be related to unsafe renovations or DIY projects.
  • Professional Oversight: Hiring a licensed contractor ensures that the work meets code requirements. This professional oversight can help you avoid costly mistakes and legal issues.
  • Resale Value: Proper permits and compliance can affect your home's market value and resale process. Buyers and inspectors scrutinize unpermitted work, which can complicate or delay property sales.
  • Long-Term Costs: Unpermitted work can be more expensive in the long run. This is because you may need to redo work to meet current codes. Homeowner's insurance might refuse to cover issues resulting from unpermitted or unsafe work, leading to out-of-pocket expenses.

gutter guards in shingled roof

Do Gutter Guards Damage Shingles? Expert Insights Explained

Are you considering installing gutter guards but worried they might damage your shingles? This is a common concern among homeowners, and it's essential to understand the potential risks and benefits.

Gutter guards can sometimes harm your shingles if not installed correctly. This can potentially void your shingle warranty and cause water damage.

gutter guards in shingled roof

Different types of gutter guards interact with shingles in various ways.

Some designs, like K-style gutter guards, require lifting the front row of shingles. This can lead to damage or even roof leaks.

On the other hand, some guards, such as screen or micromesh types, do not necessitate altering your shingles. They also provide effective protection without the downside.

By understanding the correct installation methods and choosing the right type of gutter guard, you can protect your roof and gutters effectively. With Mike Owen from Gutters Of West Palm Beach, we will dive deeper into the types of gutter guards, their impact on shingles, and how to avoid common pitfalls.

Understanding Gutter Guards and Their Impact on Shingles

https://www.youtube.com/embed/fetPCYwFYgk

The interaction between gutter guards and shingles can impact the integrity of your roof. Proper installation and the type of gutter guard play significant roles in minimizing any potential risks to your shingles.

Types of Gutter Guards and Shingle Interaction

Different types of gutter guards interact with shingles in varying ways.

Mesh gutter guards usually sit on top of the gutter and underneath the roof shingles, potentially affecting the shingles' alignment.

Foam gutter guards fit inside the gutters and are less likely to disturb the shingles.

Meanwhile, screen gutter guards can overlap with the drip edge of the roof. This can potentially cause moisture issues if not correctly installed.

Choosing the right type matters. Some might require you to lift the shingles, which can lead to leaks or damaged tar seals. Understanding how each type fits with your roof can prevent complications later on.

Proper Installation Techniques

Proper installation is crucial to avoid damage while installing gutter guards.

When considering professional installation, ensure the contractor uses correct techniques such as securing guards with screws without lifting shingles excessively. See Mike Owen from Gutters Of West Palm Beach for quality gutter works.

The drip edge should also be carefully accounted for to prevent water penetration.

If you’re installing gutter guards yourself, follow manufacturers' guidelines rigorously.

Pay attention to how the guards overlap with roof components, like the roof shingles, and use appropriate tools to avoid nails or other methods that might harm your shingles.

Potential Risks and Cons of Gutter Guards on Shingles

Improper installation or poor-quality gutter guards can lead to risks.

Incorrectly affixed gutter guards may disturb the roof shingles, causing damaged edges or broken seals. This can lead to leaks and subsequent water damage.

Additionally, choosing the wrong type or not fitting them properly can void your roof warranty.

Potential cons also include the need for more frequent checks compared to professionally installed systems.

With time, even well-installed guards can cause issues if they overlap incorrectly. They can also cause problems if the leaves and debris aren't channeled away efficiently, requiring extra maintenance.

Maximizing Gutter and Roof Longevity

Proper maintenance of both gutters and roof shingles is essential for preventing water damage and extending the lifespan of your home’s exterior elements. Correctly installed gutter guards can play a significant role in this effort.

Gutter Maintenance and Guard Efficacy

Regular maintenance of your gutters ensures they remain clear of debris such as leaves, twigs, and dirt.

When left unchecked, these materials can cause clogs that prevent proper water drainage. During winter, clogged gutters can lead to ice dams which may damage both gutters and shingles.

Gutter guards like the LeafFilter and micro-mesh guards, including the Raptor gutter guard, offer effective solutions to minimize debris accumulation.

These products work by preventing large debris from entering the gutters while allowing water to flow freely. For optimal results, ensure the guards are compatible with your gutter system and properly installed.

Cleaning the downspouts is also vital. Regular checks and cleaning prevent clogs, maintaining an efficient water barrier that protects your foundation and prevents mold and wood rot.

Advantages of Gutter Guards for Roof Preservation

Installing gutter guards provides several advantages for your roof.

By reducing the risk of clogs, gutter guards help maintain an unobstructed flow of water. This averts potential water damage to your shingles and attic insulation.

Products like LeafFilter gutter protection often come with a lifetime warranty, providing long-term security.

Gutter guards also prevent the formation of ice dams during winter.

They keep gutters and downspouts clean so that water flows properly. This protects both the roof and the foundation from frost damage.

Incorporating these measures not only prolongs the life of your gutters but also ensures the longevity of your roofing shingles.

This reduces future repair costs and preserves the integrity of your home.

a house without roof gutter

Why Are Gutters Not Required in Florida? Weather and Construction Insights

Florida's unique climate and soil conditions mean that gutters are often seen as unnecessary for many homes. With sandy soil that quickly absorbs moisture and a lack of basements, common concerns in other regions don't apply.

Builders also note that without deep eaves or multiple roof levels, water pooling and related damage are minimal.

a house without roof gutter

Maintaining gutters in Florida can be more hassle than help due to frequent high winds and heavy rainfall.

Debris buildup from leaves and twigs leads to clogs, which might cause more harm than protection. Without the harsh winter weather other states face, the need for gutters diminishes even further.

"In many cases, leaving out gutters reduces maintenance demands and mitigates issues like mold and mildew." said Mike Owen from Gutters Of West Palm Beach.

For these reasons, many homeowners and builders alike find that the absence of gutters suits Florida's environment perfectly.

Understanding Florida's Unique Climate and Construction

https://www.youtube.com/embed/NdHxcQvrZ3k

Florida's unique climate and specific construction standards greatly influence the design of homes in the region.

Key factors include heavy rainfall, a subtropical climate, and the specific requirements of the Florida building code.

Climate Considerations in Florida

Florida's climate is characterized by a humid subtropical environment, leading to heavy rains and intense downpours, particularly during the rainy season.

Tropical storms and hurricanes are common, bringing substantial rainfall that can quickly overwhelm traditional gutter systems, causing clogs and potential damage.

The uneven rainfall distribution across various regions necessitates different construction methods.

The state's flat terrain and sandy soil allow for rapid absorption of rainwater, reducing the immediate need for gutters.

These climatic factors make alternative rainwater management strategies more effective.

Construction Standards for Florida Homes

Florida homes are built with specific adaptations to counter the frequent heavy rains and high winds.

Florida building codes prioritize construction techniques that minimize water damage without relying solely on gutters.

Homes often feature roof overhangs of more than 6 inches, which help direct water away from the foundation.

Additionally, the absence of basements in most Florida homes reduces the risk of water infiltration.

Builders often construct homes on sloped sites to naturally channel water away, preventing pooling.

The combination of these construction standards ensures stability and protection against Florida's unique weather challenges.

The Role of Gutters in Home Protection

Mike Owen from Gutters Of West Palm Beach highlights that gutters play a crucial role in safeguarding your home from various water-related issues. They help divert rainwater away from your home's foundation, prevent soil erosion, and mitigate potential water damage.

Preventing Water Damage Without Gutters

Living without gutters can lead to significant water damage to your home. Without proper drainage, rainwater can accumulate around the foundation.

This can cause flooding, mold, mildew, and other moisture-related problems.

Landscaping and grading can help divert water away from your home. Ensuring your yard slopes away from the foundation makes a big difference.

Basement and foundation cracks are more likely without gutters, so proper ground leveling is crucial.

Downspouts and drainage systems can also be installed to help manage rainwater flow without traditional gutters.

These alternatives, while effective, require regular monitoring and maintenance.

Alternatives to Traditional Gutter Systems

Several alternative systems exist to help manage rainwater.

French drains are one such option, consisting of a trench filled with gravel or rock containing a perforated pipe that redirects surface water.

Rain chains offer a visually appealing method. These chains guide water from the roof to the ground or a basin, slowing the flow and reducing splashing.

Both options can be customized to suit your home's design and landscaping.

Drip edges and splash blocks are also useful. They direct water away from the home and prevent soil erosion.

These systems work well in Florida's sandy soil, which naturally drains well.

Cost-Benefit Analysis of Gutter Installation

Installing gutters can be a significant expense. Material choices affect the cost. For example, aluminum, vinyl, or copper are common choices. Among these, copper is the most expensive and durable.

Maintenance is another consideration. Gutters require regular cleaning to prevent clogs and leaks.

Despite the costs, gutters provide long-lasting protection for your home. They prevent costly repairs associated with water damage, such as foundation, siding, and basement repairs.

Weighing the installation and maintenance costs against the potential cost of water damage can help you make an informed decision.

Properly managing rainwater is essential to protect your home. While traditional gutters are effective, alternative systems and thorough planning can also provide sufficient protection.

worker patching out a big hole in the roof

How to Patch a Large Hole in a Roof: Expert Steps for Effective Repair

When you're faced with a large hole in your roof, it can seem like a daunting challenge. Yet, with the right guidance and materials, you can tackle this problem head-on. This can save time and money you'd otherwise spend on a professional roofer like CJ Commercial Roofing NJ.

worker patching out a big hole in the roof

To patch a large hole in your roof, you'll need to prepare the area, secure the patch, and ensure it's waterproof.

You'll begin by clearing the area around the damaged section and organizing your tools. This preparation sets the stage for an effective repair.

Next, carefully install new roofing materials over the hole. Make sure to extend them past the damaged area to ensure a secure fix.

Finishing touches like applying roofing tar and fitting shingles ensure the patch blends seamlessly with your existing roof. This methodical approach turns a complex task into a manageable DIY roof repair.

Preparing for the Repair

https://www.youtube.com/embed/Y2voIdzqipY

Proper preparation ensures a safe and effective repair. You'll need to focus on safety measures, thoroughly assess the damage, and gather the right tools and materials.

Safety First

Prioritize safety before starting any repair. Wear appropriate safety gear such as gloves, rubber-soled shoes, and a helmet to prevent injuries.

Use an extension ladder that is securely positioned and stabilized against the house. Ropes and hooks can be used to attach the ladder to the fascia, providing additional stability.

Avoid overloading your hands when climbing the ladder. Instead, use a tool belt.

Make sure the working area is free from debris to prevent accidents. Consider enlisting a helper to assist with handing tools and materials up to the roof.

Assessing the Damage

Conduct a thorough roof inspection to understand the extent of the damage. Identify all problem areas, focusing on visible cracks, holes, and signs of water damage.

Look for signs of moisture beneath shingles, inside the attic, or on the ceiling. Checking for leaks early can help prevent further damage to the structure.

Use a flashlight to look for any dark spots, mold, or rot that might indicate water seepage.

Document the damaged areas with photos for reference. This will help you determine the amount and type of materials you'll need for the repair.

Gathering Necessary Tools and Materials

Collect all the necessary tools and materials before starting the repair.

Essential tools include a hammer, pry bar, utility knife, and roofing nails.

You'll also need roofing materials such as shingles, plywood, tar paper, roofing tar, and roofing cement.

For sealing and patching, prepare appropriate patching material that fits the type of roof you have.

Make sure you have enough roofing nails and cement to secure everything in place.

Organize your tools and materials in a way that allows easy access and mobility once you're on the roof. This preparation will make the repair process smoother and more efficient.

Executing the Repair

Repairing a large hole in your roof involves removing damaged materials, installing the patch, and finishing to ensure waterproofing. Proper attention at each step will help prevent future water penetration and structural issues. But if you find it hard to do, just refer it to CJ Commercial Roofing NJ.

Removing Damaged Materials

First, assess the damaged area to determine the extent of the work needed.

Use a pry bar to remove the damaged shingles and roofing nails around the hole. Be careful when prying to avoid causing additional damage to the surrounding roof decking.

Next, cut away any damaged roof decking using a reciprocating saw. Ensure you cut back to the nearest rafters for proper support when installing the patch.

Clear the area of any debris to prepare for the next steps.

Installing the Patch

Measure the hole and cut a piece of plywood or roof decking to fit, with at least a six-inch overlap on all sides.

Place the new decking over the hole and secure it to the roof rafters using nails or screws.

Cover the new decking with roofing felt or tar paper, ensuring it overlaps the existing materials by at least 2 inches. Secure it with roofing nails.

For roof shingles, cut new shingles to size and slide them under the row above, aligning with adjacent shingles. Nail them into place, ensuring the nails are covered by the above row.

Finishing and Waterproofing

To seal the patch, apply roofing tar or liquid nails around the edges of the new decking and shingles. Spread it evenly to cover small cracks and ensure a waterproof seal.

If using metal flashing, place it over the patch and secure it with roofing nails. Then, cover the seams with roofing cement.

Finally, inspect the entire patched area for gaps or exposed nails. Apply caulk to any small gaps or cracks to ensure complete waterproofing.

Monitor the patch over the next few days, especially after any rain, to confirm it remains watertight.

a good roofing installed in a commercial building

What Happens If You Don’t Use Underlayment on a Roof: Risks and Consequences

Roof underlayment serves as a critical barrier between your roof shingles and the sheathing.

Without underlayment, you risk water seeping through, which can lead to rotting decking, leaks, and mold growth.

a good roofing installed in a commercial building

This protective layer ensures the longevity and durability of your roofing system, safeguarding your home from potential water damage and harsh weather conditions.

For homeowners looking to maintain a sturdy and reliable roof, underlayment is essential. It acts as a secondary line of defense, particularly during heavy rain or snow.

Skipping this step leaves your home vulnerable to costly repairs and reduced structural integrity.

You might be tempted to cut corners, but doing so can have severe repercussions on your home’s overall protection.

Understanding the necessity of roof underlayment can save you money and headaches in the long run.

With a dependable underlayment in place, you're better equipped to face the challenges posed by nature, ensuring your home remains comfortable and dry.

"Prioritizing this component can make all the difference in the performance and sustainability of your roofing system." said Charles Jimerson from CJ C.ommercial Roofing NJ.

Consequences of Skipping Underlayment

https://www.youtube.com/embed/QYfD6jUndqs

Failing to install underlayment can lead to water infiltration, reduced roof performance, and increased financial burdens. Let us understand these effects with Charles Jimerson from CJ Commercial Roofing NJ.

Immediate and Long-Term Damage Risks

Without underlayment, your roof is exposed to immediate water infiltration. Water leaks can cause rot and mold, both of which can severely damage the wooden roof deck. Over time, these issues weaken the structural integrity of your home.

During severe weather, asphalt shingles alone might not offer sufficient protection.

Without underlayment, wind-driven rain can easily penetrate your roof, leading to water damage. Continuous exposure to moisture can accelerate deterioration, reducing the lifespan of your entire roofing system.

Impacts on Roofing System Performance

Underlayment enhances tear resistance, helping the roofing material endure various climatic conditions.

When it's absent, shingles alone bear all the environmental stress. This makes them more prone to damage, reducing their effectiveness.

In climates with heavy rainfall or snow, the underlayment adds a vital layer of water resistance. It prevents water from seeping into the roof deck.

Skipping it can compromise the overall performance and longevity of the roofing system, leading to frequent repairs.

Financial and Structural Implications

Not using underlayment can result in significant financial and structural consequences.

Water damage repair costs can be substantial. Rot and mold issues often require expensive fixes, including replacement of affected wood and other materials.

Insurance claims for water damage might be denied if the absence of underlayment violates building codes.

You may also face higher estimates for repairs and roof replacement in a compromised system.

Additionally, skipping underlayment can void roofing warranties, leaving you without protection from defects or poor installation by contractors.

Factors Affecting Underlayment Choices

When choosing underlayment for your roof, key factors include material durability and suitability to your roof's pitch and environmental conditions.

Understanding Different Underlayment Materials

Underlayment materials vary widely in durability, weight, and specific characteristics.

Felt underlayment, also known as felt paper or tar paper, is a traditional choice. It is cost-effective and offers basic moisture resistance but can be heavier and tear more easily.

Synthetic underlayment options like polypropylene or polyethylene are lightweight and known for their strength and resistance to tearing.

Rubberized asphalt underlayment includes rubber polymers for exceptional water resistance and fiberglass reinforcements for added strength. These materials can also offer better energy efficiency and sound barriers.

Choosing the right type of underlayment depends on the specific needs of your roofing project, including material warranties and compatibility with metal roofs or other roofing types.

Considerations for Roof Pitch and Environmental Conditions

Roof pitch significantly impacts your choice of underlayment.

Steep pitches may benefit from lighter synthetic materials. These materials adhere better and offer superior water-shedding capabilities. For low-slope roofs, rubberized asphalt and other moisture-resistant underlayments are crucial to prevent water backing up under shingles.

Environmental conditions also play a vital role.

In areas with extreme temperatures, ice dams, high winds, snow, and rain, you need an underlayment that provides excellent insulation and durability.

Synthetic materials are often preferred for their resilience in harsh weather. Meanwhile, felt underlayment might be sufficient for milder climates.

Your choice should also consider insulation properties and energy efficiency, especially if you live in regions with significant temperature fluctuations.

TOP -