Replacing a roof is a significant investment for any homeowner. However, with the right tools, materials, and knowledge, it is possible to replace a roof yourself.
Before you begin, it’s important to assess the scope of the project. Take the time to evaluate the condition of your existing roof and identify signs of damage, such as missing shingles or leaks.
“Determine the complexity of the project by assessing the roof’s age, type, and slope. Keep in mind that a DIY roof replacement project can take anywhere from a few days to several weeks, depending on these factors.” said Charles Jimerson of Commercial Roofing NJ.
In this article, we will guide you through the process of replacing a roof step-by-step. We will cover everything from preparing the roof deck to installing new materials and ensuring proper sealing and finishing.
Preparing for Roof Replacement
Before you start replacing your roof, you need to prepare yourself and your house for the project. This section will guide you through the steps you need to take to ensure a successful roof replacement.
Assessing Your Roof and Materials Needed
The first step in preparing for a roof replacement is to assess your roof. You need to determine the type of roofing material you have and the area that needs to be replaced.
This will help you determine the amount of materials you need to purchase. You should also inspect your roof for any damage or leaks and make note of any areas that need special attention.
If you are unsure about the condition of your roof, it is best to hire a professional roofer like Commercial Roofing NJ, to inspect it for you.
Once you have assessed your roof, you can start gathering the materials you need for the project. The materials you need will depend on the type of roofing material you have and the size of the area that needs to be replaced.
Some common roofing materials include asphalt shingles, wood, metal, slate, clay tile, and concrete tile.
Safety and Legal Considerations
Roof replacement is a DIY project that requires careful planning and execution. Safety should be your top priority when working on your roof.
You should always wear safety gear such as a hard hat, safety glasses, and a harness. You should also use a sturdy ladder and make sure it is properly secured.
In addition to safety precautions, you need to consider legal requirements. In many areas, you need a permit to replace your roof.
Check with your local building department to find out what permit requirements you need to meet.
You also need to consider the impact of your roof replacement on your neighbors. Roof replacement can be noisy and disruptive, so it is important to let your neighbors know about the project in advance.
You may also need to take steps to protect your landscaping and other property from damage during the project.
To prepare for your roof replacement, you should also consider using tarps to protect your home from the elements during the project. This will help prevent water damage and other problems that can arise during the installation process.
Executing the Roof Replacement
Now that you have prepared for the roof replacement, it’s time to execute the project. This section will guide you through the three main steps of the process: removing old roofing, installing new roofing, and finishing touches and cleanup.
Removing Old Roofing
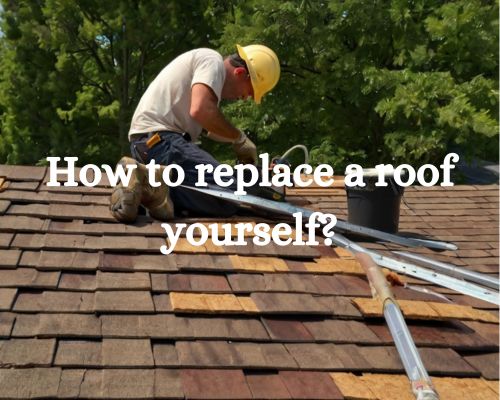
Before you can install new roofing, you need to remove the old one. Start by removing all the old shingles and disposing of them in a dumpster.
Use a roofing shovel to pry off the old shingles and a roofing nailer to remove the nails. Be sure to wear work gloves to protect your hands.
Once you have removed all the old shingles, inspect the roof deck for any damage. Replace any damaged wood and install underlayment and drip edge as necessary.
Installing New Roofing
Now it’s time to install the new roofing. Begin by measuring the length, width, and slope of your roof to determine the size in squares.
Use chalk lines to mark the roof and ensure a straight installation. Then, install underlayment and drip edge before laying the shingles.
Start laying the shingles from the bottom of the roof to the top. Use roofing nails and a hammer to secure the shingles in place.
Be sure to follow the manufacturer’s instructions for the specific type of shingle you are using. If you have any valleys, hips, or ridges, install flashing to prevent leaks.
Install ridge cap shingles at the peak of the roof for added protection.
Finishing Touches and Cleanup
Once you have installed all the new roofing, it’s time to add the finishing touches.
Install gutters and downspouts to direct water away from your home. Then, seal any gaps or cracks with roofing cement.
Finally, clean up the job site by removing any debris and disposing of it properly. Take pride in your DIY roof replacement project and enjoy the new roof that you installed yourself!
Remember, while you can save money by doing the project yourself, it is important to weigh the pros and cons of a DIY roof replacement versus hiring a professional roofing contractor.
Consider the labor costs, your level of experience, and the size and complexity of the roofing project before making a decision.